A broken toilet is a complete mystery to the majority of householders. Sometimes there occurs ghost-flushing, which is a bizarre phenomenon in which the toilet flushes by itself. At times, the toilet may run continuously, refusing to stop flushing no matter what you do. Then there’s the issue of a toilet tank not filling up with water after flushing, which is common in many homes.
Before you can repair the damaged flush system, you must first determine what is causing the issue in your toilet. There are numerous reasons why a toilet tank does not fill with enough water, ranging from a worn-out flapper to a failed float ball. Once you’ve determined the source, contact a local plumber to have the toilet repaired as quickly as possible.
There are numerous reasons why the toilet tank does not fill with water after flushing, so it is essential to go over each possibility one by one. If your toilet isn’t filling with water or is taking too long to fill, we’ll teach you how to fix it in this post.
Toilet Not Filling Up With Water
It’s perplexing when your toilet tank isn’t filling but the water is running. Why wouldn’t the tank fill up while the water is running normally? This is a problem since the toilet cannot flush when the tank is empty. If you share a home with other people, this is a problem that must be addressed immediately. If you have basic plumbing expertise, you can easily diagnose this type of problem.
Related Articles: Goosehead Insurance Reviews 2022: Pros and Cons, Best Products
This issue could have been caused by a single or multiple components. These are components of your toilet that could fail and cause this issue.
Water supply stream
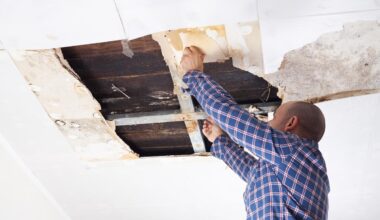
If the water supply pipe to your toilet leaks, the tank will still fill, albeit slowly. If the leak is not repaired, the tank will begin to fill more slowly over time. This is something that a plumber should check into right away. Hidden leaks can cause drywall, flooring, and other structural parts to deteriorate. To make matters worse, they can result in hefty water bills.
It’s perplexing when your toilet tank isn’t filling but the water is running. Why wouldn’t the tank fill up while the water is running normally? This is a problem since the toilet cannot flush when the tank is empty. If you share a home with other people, this is a problem that must be addressed immediately. Furthermore, if you have basic plumbing expertise, you can easily diagnose this type of problem.
The floating
The float is the component that connects to the fill valve inside the toilet tank. When the tank fills up with water after a flush, the float prevents it from overflowing. When the float isn’t working properly, it’s usually because it’s set too low, preventing the tank from completely filling. Another symptom that your water level is too low is if your toilet does not flush completely.
The fill valve
The fill valve is normally located on the left side of the toilet tank. It is the component of the toilet that returns water to the tank after flushing. When the fill valve stops working, it could be due to a blockage or it could be too old and worn out to function properly. Fill valves will also occasionally fail.
The trip assembly
A trip lever is a handle that you use to flush your toilet. The trip assembly is the portion that is located inside the toilet tank and is connected to the outside handle. The toilet will not flush properly if the trip assembly becomes deformed or broken. This signifies that the tank will not properly fill after flushing.
Related Articles: AVERAGE CONSTRUCTION WORKER SALARY in OREGON, GEORGIA
The flapper
The flapper is the rubber device at the bottom of the toilet tank that is lifted upward when you flush the toilet. Also, the flapper allows water from the tank to flow into the toilet bowl, flushing it. When the flapper returns to its original position after flushing, it seals the tank once more, allowing it to be refilled with water.
Toilet Not Filling Tank
A toilet tank is meant to refill with water after each flush. The water level should be about 12 inches below the overflow tube, and refilling should take around 10 seconds. If your toilet is not filling with water or is filling slowly, we will show you how to fix it.
If a toilet tank does not fill with water after flushing, it could be due to a malfunctioning fill valve, the incorrect height of the toilet float, a leaking flapper, a fractured overflow tube, or low water pressure. Furthermore, if the toilet tank does not fill after flushing, ensure sure the shutoff valve is completely open.
What should you do if your toilet tank doesn’t fill?
#1. Adjust the toilet float
Your toilet will either have a float ball or a float cup or cylinder. Float balls are typically found in older toilet types, whereas float cups are seen in newer toilets and are much smaller in size.
#2. Change the fill valve.
The fill valve is the component of the toilet tank that connects to the water supply line. It is responsible for filling the tank with water after flushing. It is also connected to the refill tube and the toilet floats on the inside.
#3. Change the toilet flapper
If your toilet isn’t filling but the water is running, the issue could be with your toilet flapper. A toilet flapper is a rubber seal at the bottom of the toilet tank that opens to allow flush water to enter the toilet bowl and makes a seal after flushing to enable the toilet tank to fill and hold water for the next flush.
#4. Change the overflow tube
The toilet overflow tube is a long tube in the middle of the toilet tank that conducts surplus water from the toilet tank down to the toilet bowl to prevent overflowing.
#5. Check the toilet water pressure
Aside from a malfunctioning fill valve, the other likely cause of a slow filling toilet is that the water pressure in your toilet is too low. This is caused by clogged old pipes or leaking water pipes.
#6. Open the stopping valve.
If a toilet tank is not filling at all, the first thing to check is that the shut-off valve is not open. It is located on the toilet’s back wall. Turn it counterclockwise to open it.
Toilet Not Filling After Flushing
The following are some reasons why the toilet tank is not filling with water after flushing:
#1. Toilet float is too low
One cause of a slow or not filling up after flushing is a lack of water in the toilet tank. A toilet float that has not been properly adjusted can cause this. If the flapper is set so that very little water enters the tank, there will be insufficient water to fill the toilet bowl when you flush it. In one flush, the toilet tank carries enough water to fill the toilet bowl.
#2. Overflow tube failure
If your toilet bowl’s overflow tube is broken, this could be the cause of the water not filling up after you flush. Debris blocking overflow tubes or being misplaced inside the tube itself frequently causes them to fail. The refill tube will send water directly to the toilet bowl with each flush.
#3. Clogged toilet bowl jets
If the toilet bowl jets become clogged, water will not be able to enter the bowl after flushing. Clogged jets are typically caused by small items entering the tank and being lodged in the jet holes, like toilet paper or toys. Toilet bowl jets are also clogged by hard water sediments.
#4. Broken fill tube seal inside the tank
A break at one end of the rubber-like plastic tubing connecting to your water supply can result in no toilet tank filling after flushing. A worn washer should also be replaced as soon as possible because it will eventually cause harm to internal mechanisms and halt the normal flow of incoming water into the tank.
Related Articles: TZ INSURANCE Reviews 2022: All you need to know
#5. Low inlet pressure into the toilet tank
Another concern is the toilet tank’s low intake pressure. Due to low intake pressure, the toilet tank will not fill with water after a flush. Toilet tanks work by balancing incoming household water pressure from the plumbing system of your home with siphon movement within the bowl itself.
#6. Plumbing issues outside the tank
If you hear a gurgling sound after each flush or if many flushes are required to properly remove waste from the bowl, there may be an issue with your flushing mechanism. Check for any leaks in pipes, faucets, and valves that could cause water loss in the system.
Toilet Not filling up
The main reason for a toilet tank not filling up with water after flushing or filling slowly is the toilet fill valve. The most common causes of a fill valve slowing down or failing to fill the tank after flushing are debris issues and the amount of time the fill valve has been in operation.
Debris that accumulates inside the water system, such as the valve body, supply line, or shut-off valve (at the wall), can block the flow channel of water and delay the valve filling speed. Working parts in toilet fill valves that have been in operation for 7 years or more may begin to wear out.
- Read on for additional information on flushing debris from your water system, or watch our instructional video:
- If you’re seeking repair components or new valves, continue reading.
Flushing debris from your water supply:
To remedy the issue, Fluidmaster recommends first flushing junk out of the valve/water system. Steps for removing the top cap and flushing trash from the fill valve:
- Shut off the water and flush the tank.
- With your right hand, reach into the tank and lift up the float cup. Hold onto the gray shaft with your right hand, holding the float cup all the way up. Allow neither the float cup nor the valve shaft to descend.
- Place your left hand on the top of the valve cap and your left thumb on the side of the arm protruding from the top. To unlock, crank the cap and lever 1/8 turn counterclockwise. The cap and lever should be able to be removed from the valve body.
Related Articles: LINCOLN AUTO INSURANCE Reviews 2022: All you need to know
- After removing the cap assembly, look for debris on the seal (rubber disc with a pin going through) and the valve portion that is still in the tank.
- Place a cup upside down over the exposed valve opening and turn on the water supply for 10-15 seconds, enabling the pressure to clear any debris inside the valve entrance.
- Replace the top of the valve by inserting the cap arm into the refill tube. To lock, press the cap while rotating the arm clockwise.
The bottom hand is pulling up on the float cup, raising the black arm beneath the top cap. The cap is held in place by the top hand, while the thumb rests on the lifted lever arm.
Replacement toilet fill valves and repair parts:
When flushing debris does not appear to be effective, the valve must be repaired or replaced.
How to Fix a Toilet Float
Depending on the type of toilet and its age, there are two fundamental types of toilet floats. The float in earlier toilets was a metal or plastic ball connected to a metal rod attached to the float valve. Plastic, cylindrical floats are an inherent feature of the float valve in newer toilets. Whatever type of float your toilet has, it’s a reasonably straightforward DIY fix. That is if you know the right step to take. When your toilet float becomes bad, follow these steps to replace it yourself.
#1. Disconnect the water supply
Before beginning any form of toilet repair, switch off the water supply to the toilet at the wall. To cut off the water supply, turn the valve beneath the toilet all the way to the right (clockwise).
#2. Drain the tank
Next, drain the tank by flushing the toilet and holding the lever down until all of the water has been evacuated. If you have properly shut off the water, the toilet tank not filling up after flushing. There may still be some water at the very bottom of the tank. This can be removed by soaking it with cloths or a sponge.
#3. Get rid of the float
When the water supply is turned off and the tank is completely empty, it’s time to remove the old float. It’s fairly simple to remove the ball style of float from an older toilet. Simply unscrew it from the float rod to which it is attached. The removal method is a little more challenging if you have a newer toilet with an inbuilt (plastic cylinder) float. Unscrew the nut that is keeping the valve in place at the bottom of the tank. This portion connects to the water supply pipe via a hole in the tank’s bottom. Disconnect the little water hoses within the tank from the float as well.
#4. Connect the new float
Connect the new float after removing the old one. The traditional ball-style floats are simple to attach to the float rod. The newer, integral-style floats simply connect to the water supply line through the tank’s bottom hole. Then reattach them to the little water hoses towards the tank’s top. That’s all!
Related Articles: West Bend Insurance: Complete Product Review
Replacing a faulty float in your toilet tank is a simple task. Furthermore, replacement components are inexpensive and easily accessible at your local hardware store. However, this is not a profession for everyone. A licensed professional can execute this quick and simple plumbing repair.
Toilet Water Valve Leaks: Symptoms and How to Fix
If you discover a leaky toilet water valve beneath your toilet, you should repair it as quickly as possible. This type of leak can result in excessive water bills as well as damage to your bathroom’s flooring, baseboards, and vanity. But how can you tell whether a water valve is leaking? Water dripping onto the floor beneath or behind your toilet suggests a water valve leak. A whirring or screeching sound emanating from the pipes beneath your toilet or inside the bathroom walls can potentially be an indication of a leak. Furthermore, if your toilet leaks when flushed, it could be a problem with the water valve.
How to Fix This Problem Yourself
Before beginning the repair, turn off the water supply to your home at the main shut-off valve. Then, turn on other faucets in the house to empty the supply line. Turn on faucets on a lower level than the toilet if possible, so gravity can help drain the lines.
If your toilet has a compression joint, you’ll need to remove the water supply hose from the valve with a crescent wrench. Unscrew the nut that connects the water valve to the pipe that runs through the wall. Make sure to remove the compression rings as well. The water valve may have been soldered onto the pipe if you have copper pipes. If this is the case, either use a tube cutter to cut the line as close to the valve as feasible or hire a plumber to do the job for you.
Related Articles: DON BULLARD INSURANCE Reviews 2022: All you need to know
If you attempt this task and discover that you are unable to complete it on your own, you can always hire a plumber to assist you. You can also employ an expert right now. This plumbing repair can be completed quickly and easily by professionals. This can save you time and headaches, and you’ll have a fully working toilet with no leaks once more.
Conclusion
Having a toilet tank that is not filling up with water after flushing is almost as bad as not having a toilet at all. With a malfunctioning toilet bowl, the toilet’s ability to transport excrement to the septic tank is rendered ineffective. Nonetheless, these flaws are manageable. This article looked at the probable causes of the toilet tank not filling up with water after flushing and simple fixes.
Frequently Asked Questions
Can you manually fill toilet tank?
Toilet tanks can be manually filled in order to flush toilets that use gravity-fed flushing systems. Remove the toilet tank lid and pour water into the tank until it reaches the fill line or is about an inch or two below the overflow tube.
Does pouring water down a toilet flush it?
Pouring a bucket of water into the toilet bowl is one of the simplest ways to manually flush your toilet. You’ll only need a bucket with a gallon or two of water. To begin the flushing cycle, older toilets may require 3-5 liters of water.
Where is the toilet overflow tube?
According to Althoff Industries, the overflow tube in a toilet is part of the flush valve. The tube rises from the siphon hole in the tank’s bottom to within an inch or two of the tank’s top, allowing excess water to drain into the bowl.
How do you install a toilet fill tube?
Install a new fill valve and connect the supply line.
- Insert the fill valve base into the tank opening after attaching the valve shank to the fill valve.
- To seal the valve, press down on the valve shank and tighten the locknut as much as feasible.
- To stop the flow of water, reconnect the supply line.
Related Articles: